So you bought yourself a new gaming laptop. That’s great. But you were just about to install Windows on it. Not so great. Then you decided you would give this new OS everybody is talking about a try. Now, that’s even better.
Unfortunately, certain manufacturers are a lot less inclined to make their hardware play nice under Linux than others. When I tried to install Manjaro on my 2019 HP Omen 15, I was immediately met with a host of issues. That’s okay though — with just a little bit of elbow grease (and a few quick terminal commands) you can get everything working even better than on Windows.
Issue 1: WTF happened to my sound?
Some newer laptops use digital microphone arrays to pick up your screaming during a match of Counter Strike. Unfortunately, support for this is not available out of the box. This shouldn’t be the case in a few months, but for now all you need to do is punch in a few terminal commands and you’ll be ready to go.
These are taken from the tutorial here as well as from various posts in the Manjaro community forums, an insanely useful resource for troubleshooting.
First we are going to check what kernel version you’re on. You can find this by:
- Opening the System Settings app.
- Under the Manjaro section, click on Kernel.
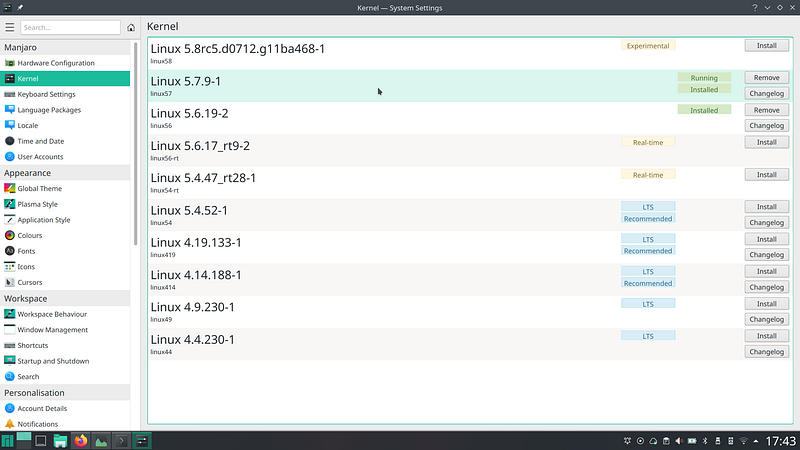
- Here are the available kernels.
As of writing, the latest stable kernel is version 5.7.9, and that’s the one you want to click and install (that is, if you’re not running it already.)
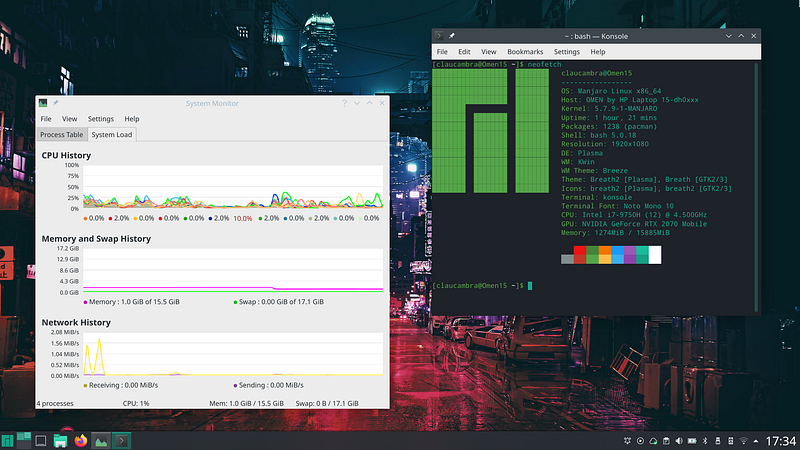
Kernel version 5.7.9 is locked and loaded.
Then you will need a cute little package called sof-firmware which will enable both your internal audio and microphone array. You can get this through Manjaro’s application manager Pamac, or by pasting the following command into the terminal:
sudo pacman -S sof-firmware
Let it do its thing. Now, we need to install a developmental version of Linux’s audio server PulseAudio that works with this driver package. We will need to build it from its source code, and while that may sound scary, all you need to do is stick to the following terminal commands.
First, open a terminal window and download the source code onto your computer using this command:
git clone https://gitlab.freedesktop.org/pulseaudio/pulseaudio.git
This will create a new folder with the name “pulseaudio”. To enter this folder in your terminal, punch this command in:
cd pulseaudio
Once that’s done, we are going to run some commands to build PulseAudio:
./bootstrap.sh
make
Let each command do its thing. It might take a while. Once they both finish, all we need to do is install PulseAudio, which can be done with:
sudo make install
sudo ldconfig
Reboot your system, and TA-DA! You should have working audio and microphones on your laptop.
Issue 2: I installed graphics drivers and now everything looks HUGE. Why are all the menus, applications, and fonts so massive?!
Nvidia drivers choose to screw with your system’s DPI settings, but luckily this is a simple fix. We’re going to have to use the terminal, though, so pay attention to the commands below!
- Open up your terminal and paste this into it:
sudo vim /etc/X11/mhwd.d/nvidia.confThis will open up a text editor that works through the terminal. - Use the arrow keys to scroll down until you find the line Section “Monitor”.
- Now, press the ‘i’ key on your keyboard. This will put the text editor into INSERT mode.
From this point on, take care — touch something that shouldn’t be touched, and you might break your system! If you make an accident, however, it’s not a huge deal: just make sure you hit the colon ‘:’ key and type ‘q’ (:q) and you will exit the text editor without any changes being saved.
- Above the EndSection line, add a new line and type: Option “DPI” “96x96”.
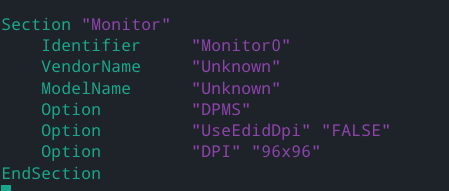
Your Section “Monitor” should look something like this.
- Press the colon ‘:’ key and write ‘wq’. On the bottom of your screen you should see ‘:wq’. This will save your changes and quit the text editor.
- Reboot your PC and voila, everything is back to a normal size.
Issue 3: now everything looks a little small…
That’s okay. We can now change your DPI settings into something more reasonable.
- Open the System Settings app.
- Under the Hardware section, click on Display and Monitor.
- This should default to opening Display Configuration. Find Global scale and set it to a setting you feel comfortable with — for me, that was 125%.
- Reboot and enjoy your human-sized interface.
This will change everything on your desktop. Your login screen on boot-up, handled by SDDM, will still however be sized for ants. To fix this we will use vim, the terminal text editor, again.
- Open the terminal.
- Paste the following command in:
sudo vim /etc/sddm.conf - Use the arrow keys to scroll down until you find the line [X11]
- Now, press the ‘i’ key on your keyboard. This will put the text editor into INSERT mode. Again, be careful when you do this.
- Below the last line of the section, add a new line and add this text:
ServerArguments=-dpi 125 - Press the colon ‘:’ key and write ‘wq’. On the bottom of your screen you should see ‘:wq’. This will save your changes and quit the text editor.
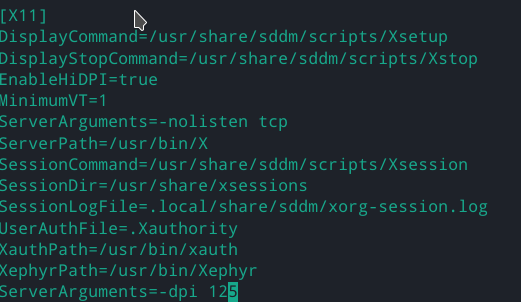
This is what the [X11] section should look like in /etc/sddm.conf
From now on your login screen will be human-sized too.
Issue 4: I have a high refresh-rate screen but even after installing my graphics drivers my desktop isn’t running at 144fps/240fps!
Kwin, a component of KDE Plasma, fails to properly detect the refresh rate of high refresh rate displays. The fix for this is quite easy, however.
- Open Dolphin (the file browser) and press CTRL+H which will show the hidden folders in your Home directory.
- Go to the folder .config and open the file kwinrc.
- Under the [Compositing] section, add a new line with the following text:
MaxFPS=240– the number should match your refresh rate.
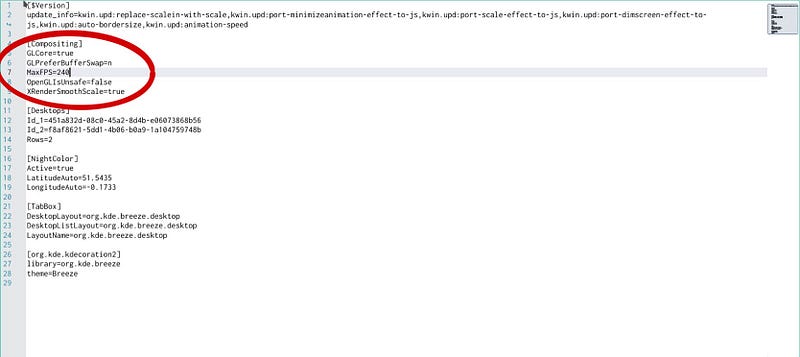
Your file should now look something like this.
- Save the file, and restart your computer.
After this is done, you can enjoy the buttery smoothness of Plasma.
Issue 5: I want to enjoy the buttery smoothness of KDE Plasma, but it keeps stuttering!
This is an issue with Plasma’s Vsync settings. To fix this:
- Open the System Settings app.
- Under the Hardware section, click on Display and Monitor.
- Under the Display and Monitor panel, click on Compositor.
- Find Tearing prevention (“vsync”), click on the drop-down menu, and select Never.
- Enjoy Plasma’s buttery smoothness.
Issue 6: Great, everything is now buttery smooth. Except Firefox, which feels like it’s still scrolling at a lower refresh rate.
Yeah, we have to change some settings there too. This one is easy, though.
- Open up Firefox and type about:config in the web browser’s search bar.
- Click Accept the Risk and Continue.
- In the website’s search bar, type gfx.webrender.enabled.
- Double click false, which should turn into true.
- Close Firefox and reopen it.
- Enjoy buttery smoothness.
Okay. Everything is working now. But that seemed like a lot of trouble to go through.
Sure, Linux distributions take a bit of time to adapt to the newest hardware that comes out as its community of volunteers and enthusiasts works to get everything working. But it’s not like you have to break your back to get stuff working here: all it took us was a few commands and menu items here and there. Within a few months, these issues will have likely been resolved.
In the meantime, these fixes exist. So you can still enjoy gaming on your laptop without being forced to use a proprietary, bloated, and privacy-violating operating system.